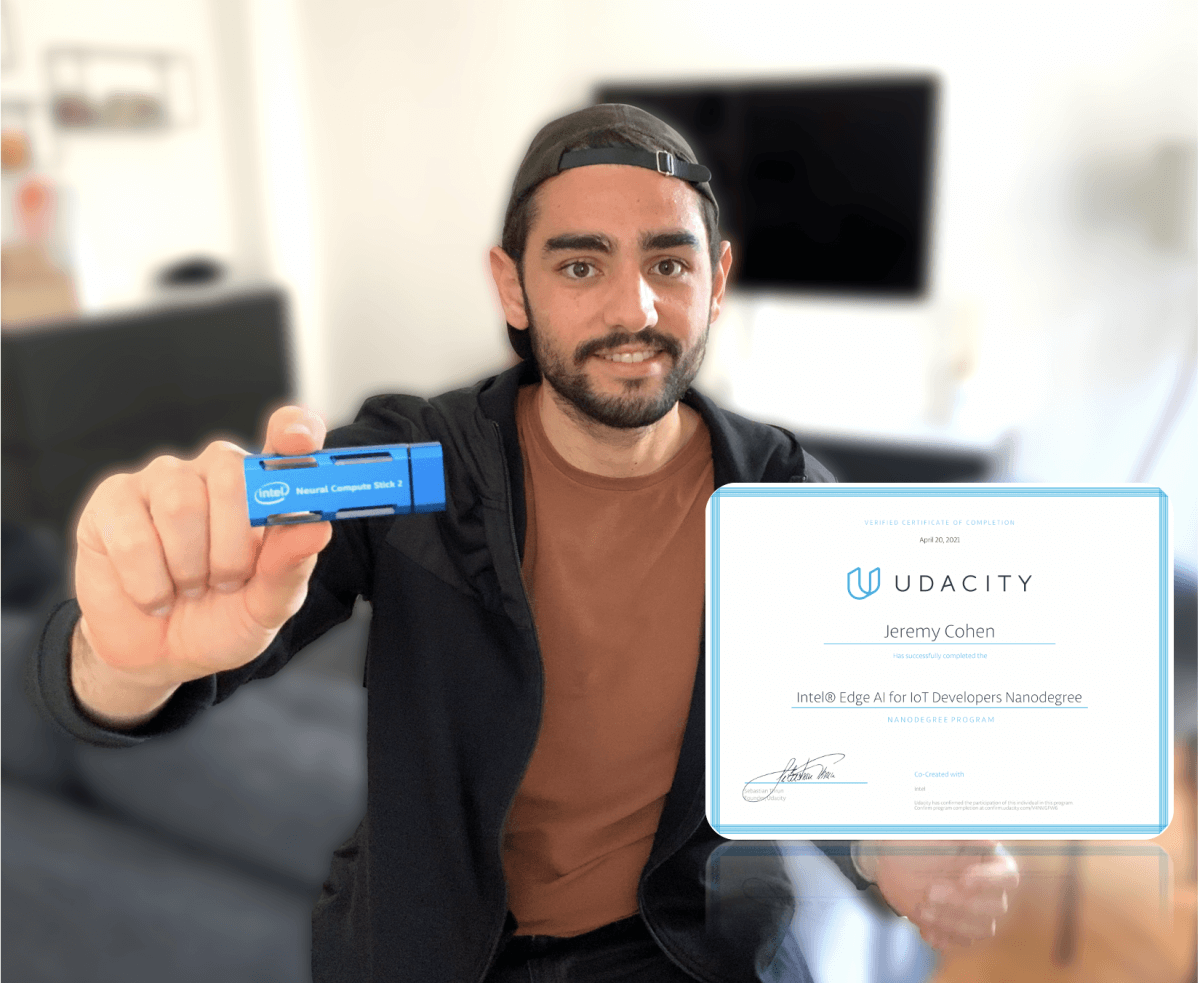
Intel Edge AI for IoT Developers Nanodegree Review (2021)
The Intel Edge AI Nanodegree is a relatively new program that will teach you how to deploy Machine Learning models at the edge. Decided to learn more about this field, I bought a Vision Processing Unit and enrolled in the Nanodegree. Today, I'm ready to share my review of this course.
In this review, will answer the following questions:
- Is it worth it?
- What kind of projects will you learn?
- What kind of topics will you master?
- What can you do with these skills?
- Should you enroll?
Ready? Let's start with the content.
To scroll directly to the end, it's here.
The Content - Deep Learning at the Edge with Intel.
The edge means any device that doesn't run on the Cloud. It can be a self-driving car, a surveillance camera in a store, an IoT device, or any other object of this kind that can't rely on the Cloud, and needs fast performance.
This Nanodegree has a strong focus on Computer Vision and Deep Learning.
It will teach you 3 main things:
- Edge AI Fundamentals with OpenVINO
In the first part, you learn to use something called OpenVINO.
It's a platform developed by Intel to deploy models at the edge... and it's quite good! - Hardware for Computer Vision & Deep Learning
In the second part, you learn to pick a hardware, and to deploy your models on each.
You will learn the differences between an FPGA and a VPU, an iGPU and a CPU, ... - Optimization Techniques & Tools for Deep Learning Applications
In the third part, you will learn about Deep Learning optimization techniques to run models faster, which is a requirement when you're at the edge.
Let's start with Part I...
Part I - OpenVINO
In this part, you learn more about Intel's OpenVINO Toolkit and deploying a model.
Your mission is to understand how to download a pretrained model, how to convert it to an Intermediate Representation (IR), and how to run it with the Inference Engine at the edge.
In other words, you'll learn how to implement this architecture with OpenVINO:
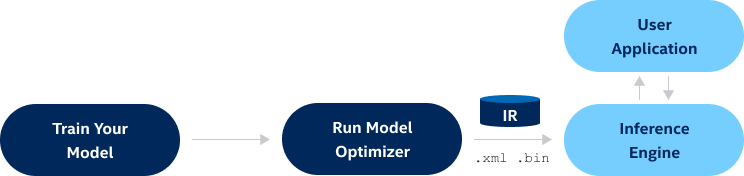
This architecture from Intel can help you gain several ms or even seconds on your operations.
This first part is divided into 6 lessons:
- Introduction
- Leveraging Pretrained Models
- Model Optimizer
- Inference Engine
- Edge Deployment
- Project
All these part represent one block of the drawing above.
👉 Part 5 on Edge Deployment was however very interesting, because you learn how to deploy an App on an MQTT Server.
These are skills that can help you build a real monitoring application, or a porfolio!
To be honest: Part I was fundamental, but very (very) long, and terribly exhaustive.😴😴😴
I almost dropped out of the Nanodegree 3 times just because of that part.
I loved Michael Virgo's work on explaining this topic, and I think he's a great instructor!
But I just thought the content was taking too long to come to the point, and the exercises not engaging enough.
Why I didn't drop out -
At some point, I was on the Settings page with the "Cancel Subscription" button in front of me.
The exercises were all very similar, long, it seemed like I could spend a full year on this part and never finish. It didn't interest me much, so I was done.
👉 Before dropping out, I realized what was wrong: I wanted to be the perfect student, that completes every lesson, and that follows everything linearly.
In other words, I had a strategy that couldn't work with my level of commitment.
This is why I changed my strategy.
👉 I decided to go straight to the project, and not to follow 2 chapters of the long (6 chapters of 20 videos each) part 1.
And this was a very good idea, I'd recommend it if you're in the same case.
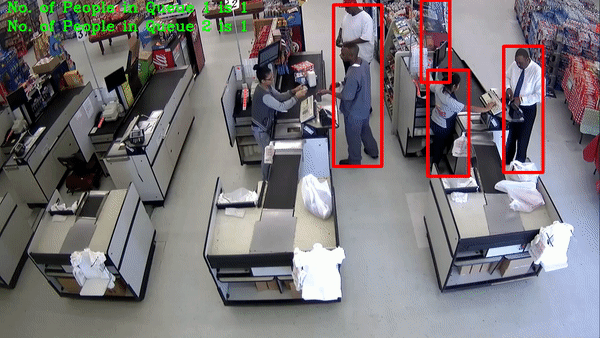
The Project 📷
In the project, you have to develop a people's counter at the edge. Imagine a surveillance camera.
It requires you to use everything you've learned before: from model optimization to MQTT deployment.
I went straight to it. After a few hours, I could have it running on already optimized models, and it was fabulous: 0.061 ms for an inference! 😳

I couldn't believe my eyes. Then, the project demands you to pick unoptimized models and to do the thing from scratch.
This motivated me to continue, to finish the project, say Goodbye to Part I, and move on to part 2.
The good thing with this strategy is that I had to go back to the course to complete the project, and at that moment, I understood why it mattered.
At that moment, I was decided to learn more about it.
Unfortunately, it failed to pass the requirements, at my people's counter was not elaborated enough. 😩
They were demanding me to think more about how to count people, how to deal with re-identifications, ...
Which I didn't care about at all at the moment...
Is this a People Counter Nanodegree? 🤬
Part I is the most important part of this Nanodegree, but it's very long. It had the most important content, but it's just boring. 😴
➡️ Because of that, I'd only rate it 2/5.
Part II - Hardware for Computer Vision & Deep Learning
In Part II, you learn about the hardware for Deep Learning.
👉 To go straight to the point, I loved that part. ♥️
You learn a lot about how to run Deep Learning models on different types of hardware. You learn how to pick a hardware depending on a use case, and how to deal with client's demands.
👉 Basically, you'll learn how to build an edge AI startup.
The content is splitted in 5 parts, and they're all much shorter than in part I:
- Introduction
- CPUs and Integrated GPUs
- VPUs
- FPGAs
- Project
What's good is that you can learn about FPGAs, and VPUs, which are rare topics.
I actually wrote an article about VPUs several months ago, you can read it here to learn more.
In the final project, you'll be asked to implement a Deep Learning solution in 3 different scenarios: Manufacturing, Retail, and Transportation.
In each, you have requirements, and you need to pick a hardware that makes sense, test your hypothesis, and conclude.
Here's my result for the Retail scenario.
Again, you need to spend some time on the algorithms, which was not the reason I enrolled.
Time & Difficulty 🧭
Unlike Part I, this part is very easy to understand and short to complete.
You'll be able to complete it in less than 5-6 hours.
I really don't know how to spend more than 10 hours on this.
Part 2 is more interesting and engaging than part 1. The topics are nicely covered, and the projects requires you to have an interesting business part.
The only thing I would note is that it's too Intel Focus, as if nothing else existed. No NVIDIA GPUs, no ARM architectures, just Intel.
And these days, Intel processors are not the most popular.
➡️ I rate this part 4/5!
Part III - Deep Learning Optimization
In the final part, we're dealing with Deep Learning optimization! You'll learn how to take a slow model, and to make it must faster.
I liked it, you can even read my article on what I learned here.
You will learn:
- How to calculate the inference time of a model, depending on the Hardware
- How to optimize a model to run faster
- By reducing the size of a model (quantization, knowledge distillation, weight sharing)
- By reducing the number of operations (pooling, separable convolutions, pruning)
These techniques are all very cool.
- You will also learn other optimization techniques with VTune.
Unfortunately, to try these yourself, you have to install something called DL Workbench and VTune on your computer. 🧐
And this wasn't a great idea.
I spent a lot of time trying to set it up, Intel's cloud solution didn't work, and the installation process from Intel wasn't easy to understand where you're not 100% focus.
➡️ I decided again to skip the exercises of that part because installation didn't work and was taking too long... and to go straight to the project.
Too bad, I wanted it to work.
The Project
In the project, you have to implement a mouse controller using Deep Learning. The camera of your computer sees your eyes, and moves the pointer toward where you're looking at. I thought that project was very interesting, and I liked the idea of developing something that can be useful to disabled people.
In this project, you have to run 4 models at the same time:
- One to detect your face
- One to detect your eyes, in your face
- One to detect your head pose
- One to identify your gaze direction
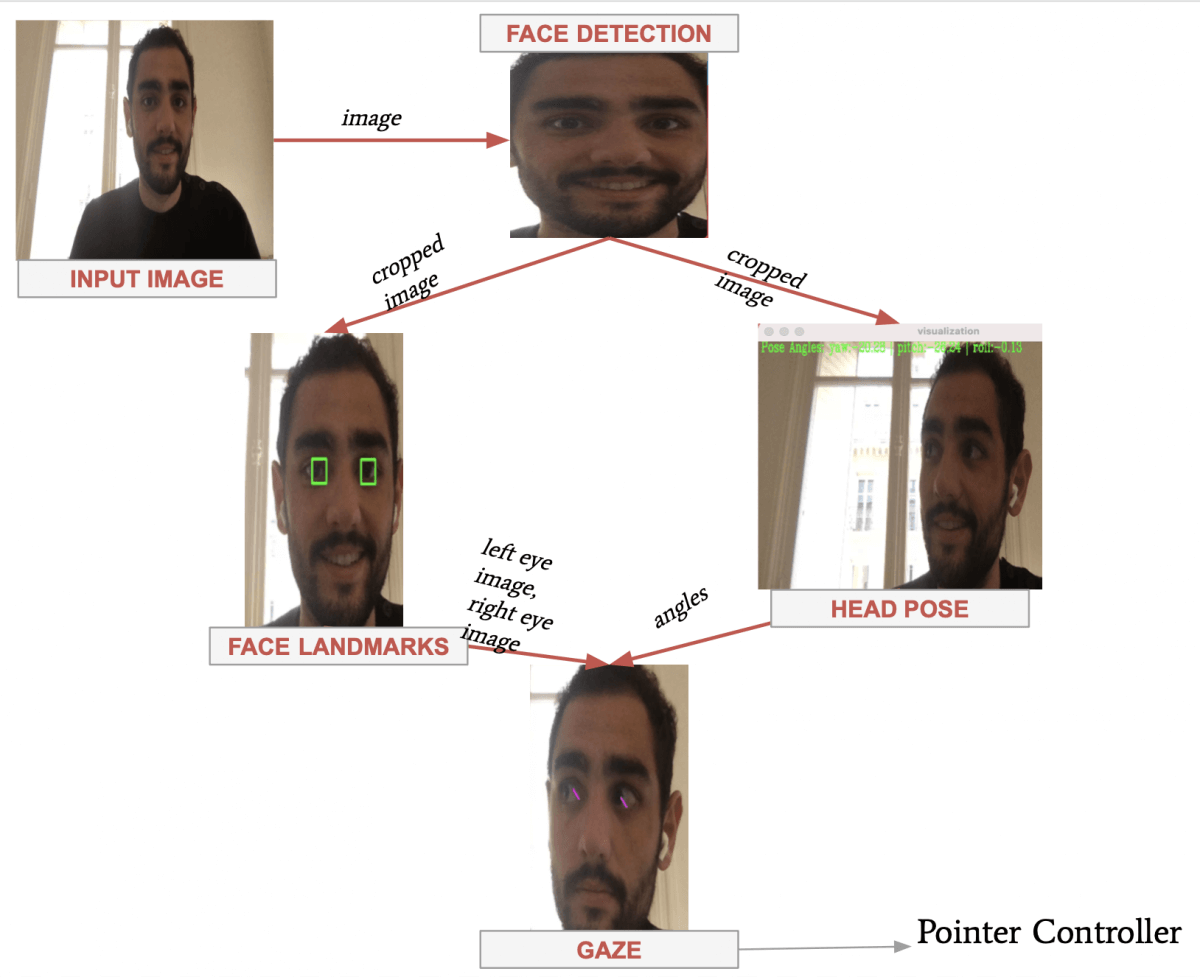
This was an interesting case, because I could easily see something like this in a self-driving car, where you have to run a lane line detection system, an obstacle detection system, a fusion node, etc simultaneously.
The project didn't require any optimization, which is weird considering it belongs to the Optimization part.
All the models were already optimized, so well that I could run all 4 of these on my Macbook Pro without any lagging issue!
➡️ This 3rd part is quite interesting if you want to learn how to run several models at the same time, and how to optimize them.
Unfortunately, there is no workspace for that, so you must do it on your computer.
I liked this part, but thought it could have been better. It takes longer to complete than Part 2, especially in my case where I didn't go with the DL Workbench.
➡️ I'd rate it 3/5.
Other Things to Consider
Here are a few things to consider before enrolling:
Prerequisites
If you already handle Deep Learning, CNNs, and Python, you're good.
If not, you won't struggle, but it makes more sense to learn about edge deployment when you already know Deep Learning. 👨🏻💼
Do you need to buy your own setup? 💻
👉 One great thing with Udacity is that they developed their own Cloud platform.
Therefore, you'll be able to run models without having to buy anything. ✅
👉 Before the course, I purchased the Intel NCS 2 (Neural Stick Compute) which is a VPU to accelerate Deep Learning calculations.
I thought about using it in the course, but I also had the challenge to complete it within a month.
Also, nothing is provided to explore the VPU and the NCS 2 option further, you're on your own...
👉 This is why I went mainly with Udacity's workspace: it had some issues from time to time, but worked great in general.
In the 3rd part, you can't use it, so you must have an "okay" computer.
The Knowledge Platform? 💡
The knowledge Platform is Udacity's forum for enrolled students. I had to use it a lot during the course.
The problem: many questions are a year old and don't have a clear answer.
A lot of solutions offered by the Mentors don't work, and the Mentors immediately require the question to be marked as closed.
That's a bit frustrating, especially when you need to understand something or to have an issue closed.
Is the attention to detail gone? 🤕
In this Nanodegree, the slides are not "Udacity Level"; they're "PowerPoint 1995 Level".
If you're used to Udacity's finish and the attention to detail, you might be a bit surprised to see images like this:
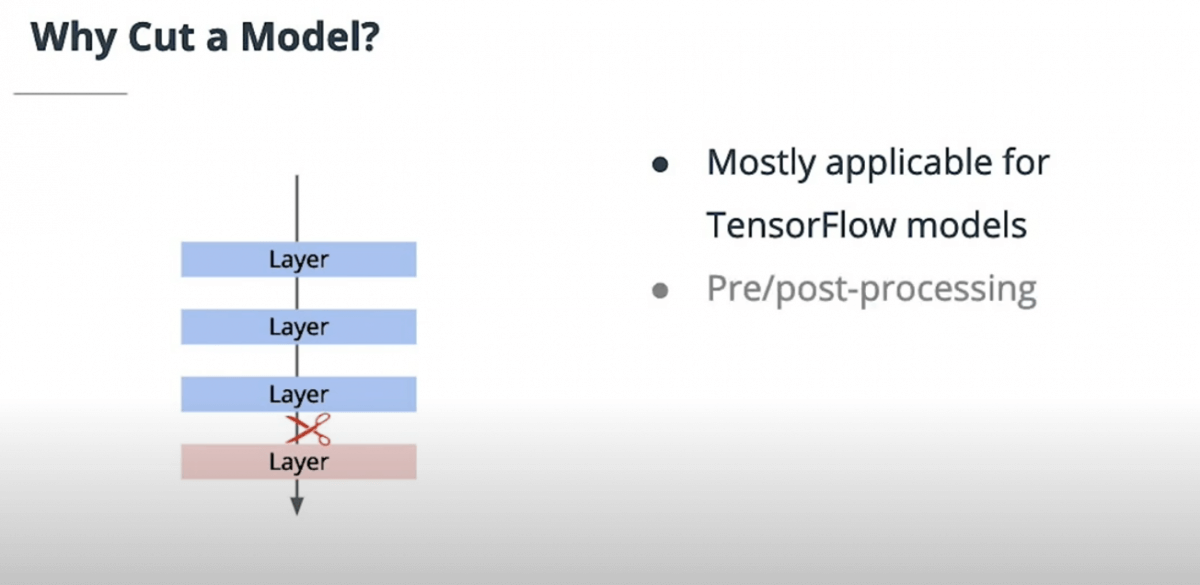
I personally don't mind, and you don't need beauty to complete, but still.
Time To Complete 🧭
As you can see, it took me a month to complete.
Can you do the same? Probably, but you'll need to dedicated some time to it.
Fortunately, you can go back to it for a year after completing, so it's a good idea.
Rushing a nanodegree is not something I would recommend to anyone, but it's always better than dropping out because the content is too long. If you're in this case, don't hesitate to start with the project, and to go back to the lessons when you need it.
The announced time for this course is 10 hours per week for 3 months, or 120 hours. 🧭
I don't believe a second that you can spend that much time on this course, unless you really explore everything possible for weeks and weeks.
I would say the time to complete with a normal pace and without skipping content is more around 30 hours.
Conclusion: Should you enroll❓
This course was my 3rd Nanodegree after the Self-Driving Car and the Sensor Fusion Nanodegree.
I liked it, but it's definitely not my favourite.
Unlike the 2 previous ones, I have recommendations before enrolling:
➡️ If you want to get these skills as additional, then enroll with 75% off, as you can do most of the time with most Nanodegrees.
The course is great, but if it's not a requirement for you, don't go all in on it.
➡️ If you want to make these skills your day-to-day, then it's totally worth enrolling, even at the full price.
You'll learn a lot of great applications, and you'll have a lot of new things to use every day.
➡️ In both cases, if you're interested in model deployment, enroll. These skills are very interesting and useful.
- To enroll in the Intel Edge AI Nanodegree, follow this link.
- To read my review of the other Nanodegrees: Sensor Fusion Nanodegree Review | Self-Driving Car Nanodegree Review