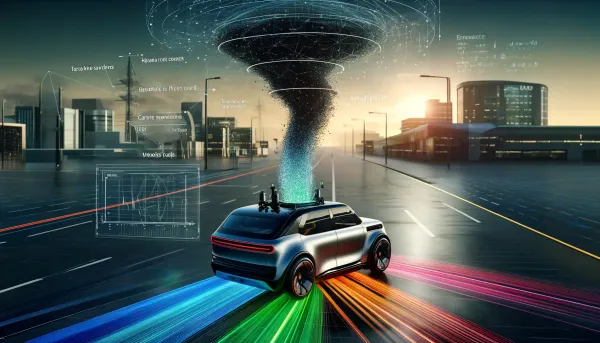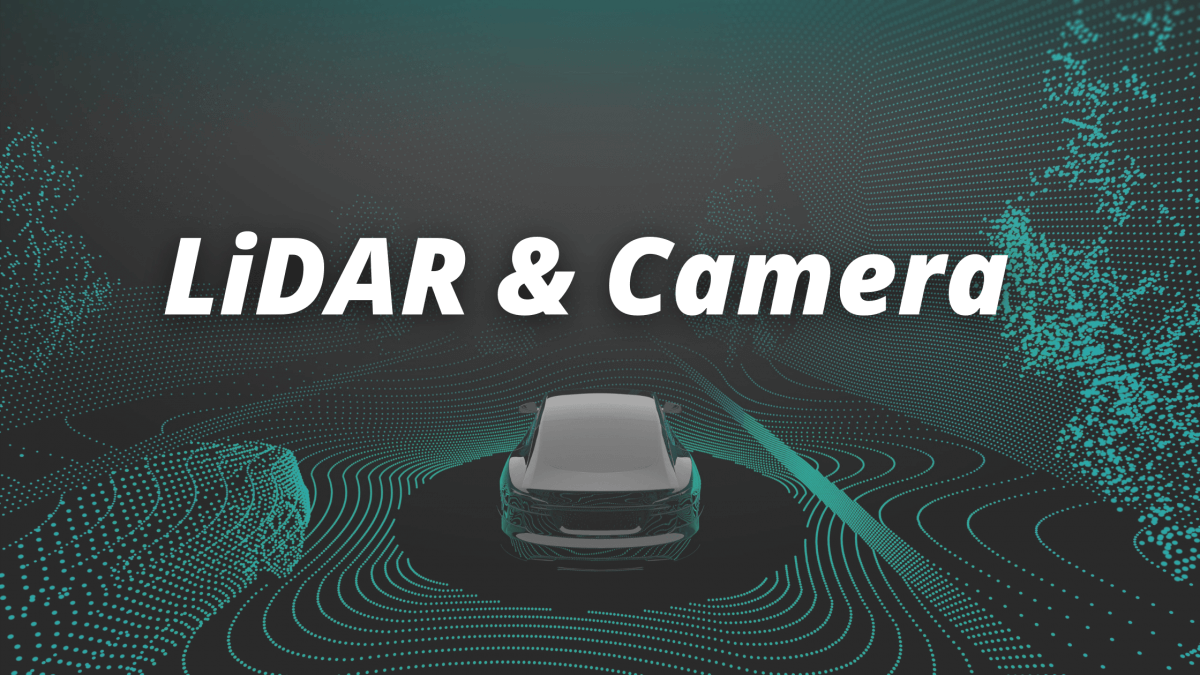
LiDAR and Camera Sensor Fusion in Self-Driving Cars
Sensor fusion is one of the key aspects of self-driving cars. It's a skill that any aspiring self-driving car engineer must have. The reason is simple: vision sensors are used everywhere, all the time.
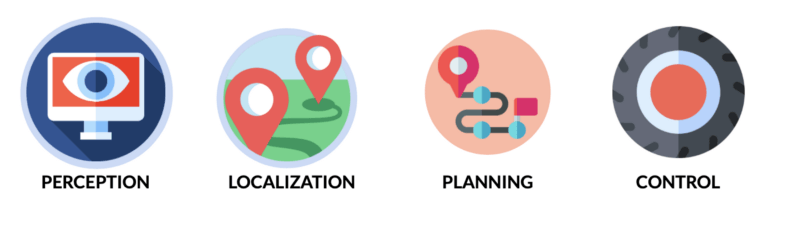
Autonomous vehicles work using 4 pillars: Perception, Localization, Planning, and Control.
Sensor Fusion is part of the Perception module. We want to fuse data from our vision sensors to either add redundancy, certainty, or to take advantage of using multiple sensors.
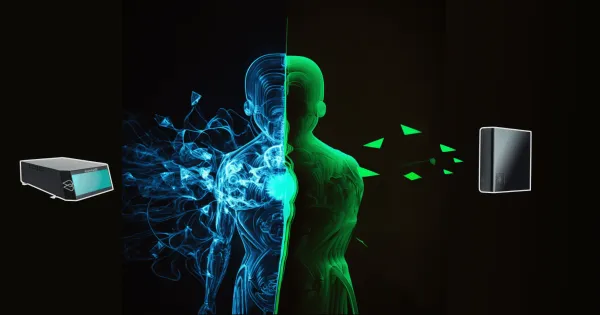
Sensor Data & Fusion
In the perception step, it's very common to use the combination of LiDARs, RADARs, and cameras to understand the environment. These 3 sensors all have a advantages and drawbacks, and using them all can help having all the advantages.
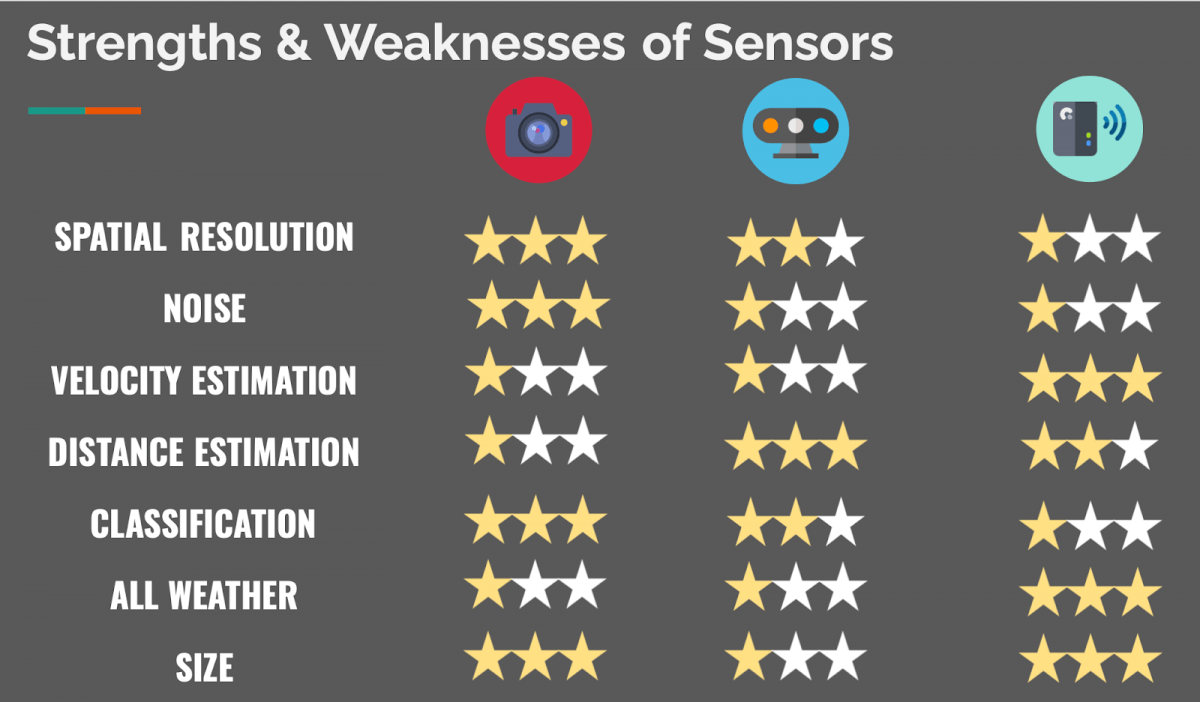
As you can see:
- A Camera is excellent to classify objects and understand a scene.
- A LiDAR is excellent to estimate distances, being a Time-Of-Flight sensor.
- A RADAR can directly measure the speed of obstacles
In this article, we'll learn to fuse a LiDAR and a Camera, and thus take advantage of the camera's resolution, capacity to understand context, and classify objects - and the LiDARs technology to estimate distances and see a world in 3D.
Camera — A 2D Sensor
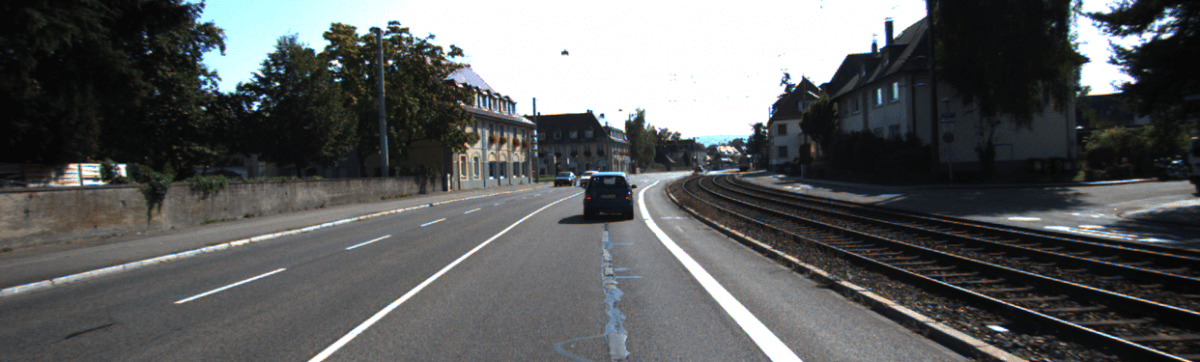
The camera is a well-known sensor that’s used to output bounding boxes, lane line positions, traffic lights colors, traffic signs, and many other things. In any self-driving car, the camera is NEVER out of the question.
How can we take this 2D sensor, and use it in a 3D world, with 3D sensors such as LiDARs?
LiDAR — A 3D Sensor
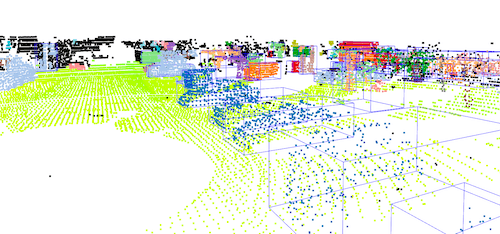
LiDAR stands for Light Detection And Ranging. It’s a 3D Sensor that outputs a set of point clouds; each one having an (X,Y,Z) coordinate. It’s also possible to perform many applications on 3D data—running machine learning models and neural networks included. Here’s an output example.
How to use this 3D sensor with a 2D sensor such as a camera?
👉 Today, you're gonna learn to combine data between LiDARs and Cameras.
Sensor Fusion Algorithms
The sensor fusion algorithms are quite numerous. Many different approaches are possible. This is why it can be important to ask the question: "What type of fusion do we want?"
As I explained in this article , there are 3 ways to classify a sensor fusion algorithm:
- By Abstraction Level - "When" is the fusion happening?
- By Centralization Level - "Where" is the fusion happening?
- By Competition Level - "What" is the fusion doing?
For more precision, please refer to the article .
The "what" is clear: we're targeting competition and redundancy. The "where" doesn't really matter, many solutions are possible. Remains the "when"...
In Sensor Fusion, we have two possible processes:
- Early fusion — Fusing the raw data - pixels and point clouds.
- Late fusion — Fusing the results - bounding boxes from LiDAR and from camera.
In this article, we're going to look at both approaches.
Let's start with early fusion.
Early Sensor Fusion - Fusing the Raw Data
Early fusion is about fusing the raw data from sensors. It therefore happens sooner as soon as the sensors are plugged.
The easiest and most common approach is to project the LiDAR point clouds (3D) onto the 2D image. We then check whether or not the point clouds belong to 2D bounding boxes detected with the camera.
This 3-step process looks like this:
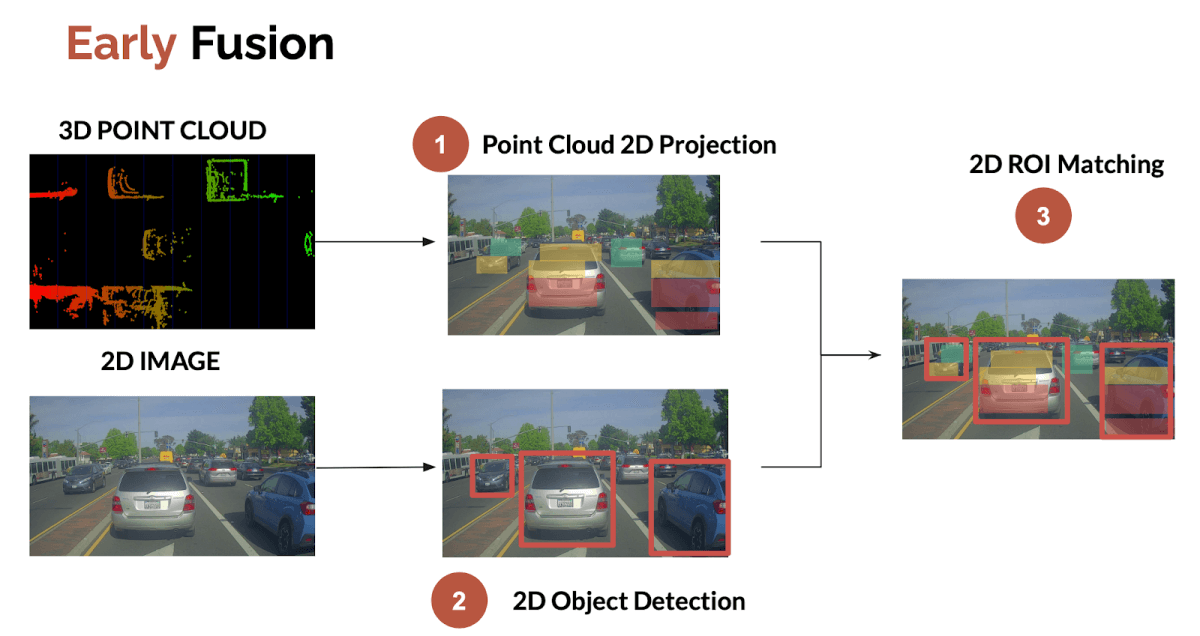
This process has been categorized in this article as a low-level sensor fusion.
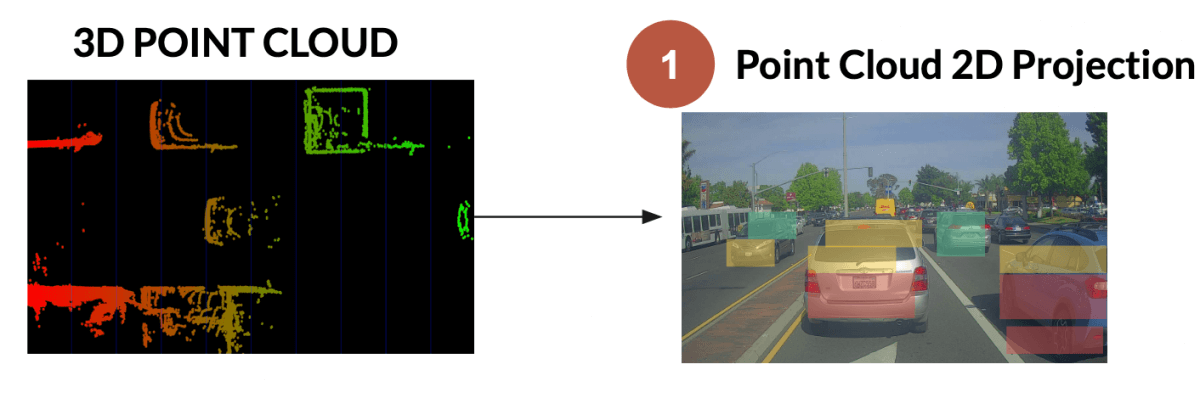
1. Point Cloud Projection in 2D
The first idea is the translation from a 3D point cloud in the LiDAR frame to a 2D projection in the camera frame. For that, we'll apply geometrical principles as follows:
(The input point cloud is in LiDAR Frame/Euclidean Coordinates.)
Convert each 3D LiDAR point into homogeneous coordinates.
Output : LiDAR Frame/Homogeneous Coordinates
Apply the projection equations (translation and rotation) of that converted point to convert this point from liDAR frame into camera frame.
Output : Camera Frame/Homogeneous Coordinates
Finally, transform the point back to Euclidean coordinates.
Output : Camera Frame/Euclidean Coordinates
If you're not familiar with projections, rotations, and homogeneous coordinates, my course on Stereo Vision can help.
Here's what the result of Step 1 looks like.
2. Object Detection in 2D
The next part is to detect an object with the camera. Let's not get into too much details on that part, an algorithm like YOLOv4 can perform the object detection. For more information about it, you can read my YOLOv4 research review .
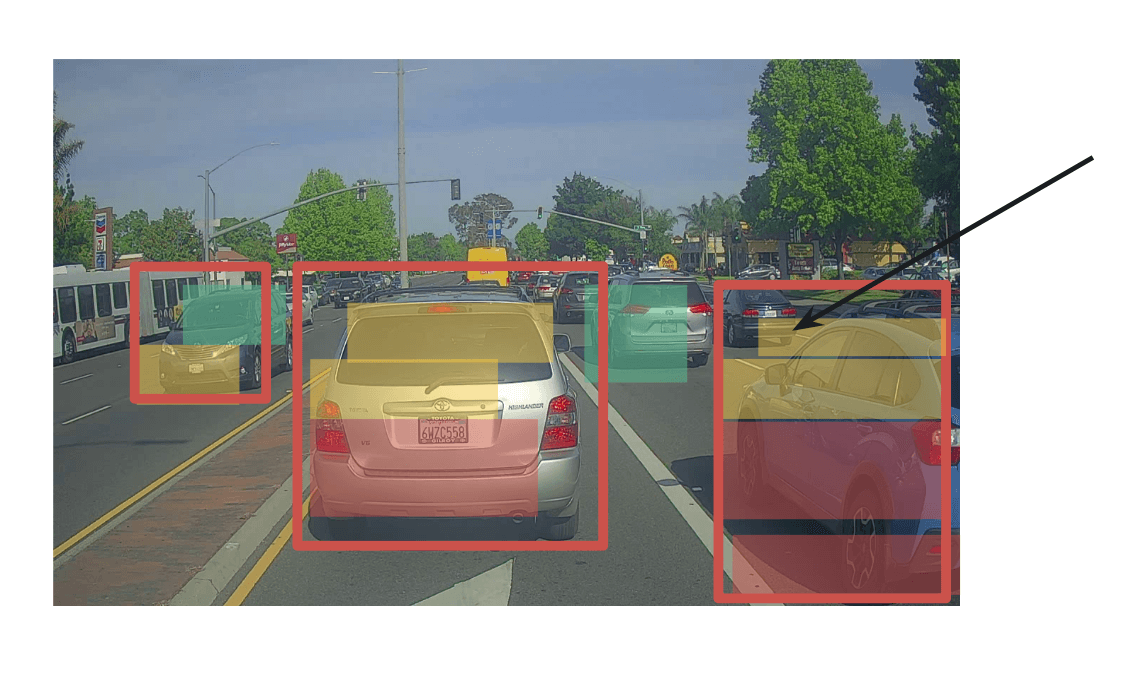
3. ROI Matching
The final part is called Region of Interest Matching. We'll simply fuse the data inside each bounding box.
What's the output of this?
- For each bounding box, the camera gives us the classification
- For each LiDAR projected point, we have a very accurate distance.
➡️ We therefore have objects measured accurately and classified.
One question can occur: which point do we pick as THE distance?
- The average value of every point?
- The median?
- The center point?
- The closest?
What if the point we select belongs to another bounding box? Or to the background? This is a tricky process. When using 2D obstacle detection, we're having this problem. A segmentation approach could be better, as we'd match points with pixels exactly.
Here's what the result looks like, with an arrow showing a point where the fusion could fail.
Late Sensor Fusion - Fusing the Results
Late fusion is about fusing the results after independent detections.
One approach we can think of would be to run independent detections, get 3D Bounding Boxes on both ends, and fuse the results.
Another approach is to run independent detections, get 2D bounding boxes on both ends, and fuse the results.
We therefore have two possibilities; to do the fusion in 2D, or in 3D.
Here's an example in 2D:
In this article, I'm going to present the 3D Process, since harder. The same principles apply for 2D.
Here's what the process looks like:
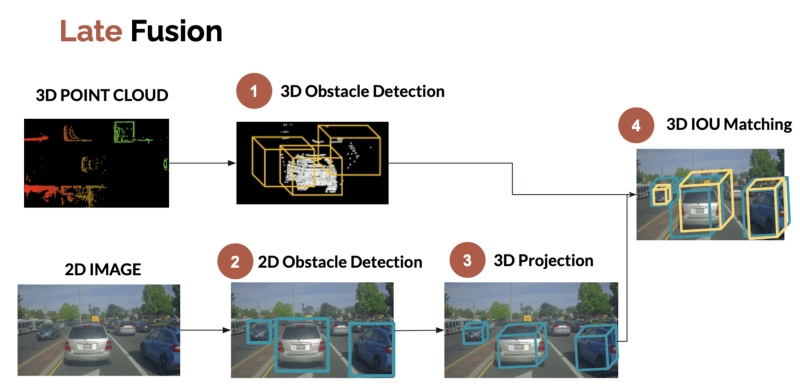
1. 3D Obstacle Detection (LiDAR)
The process of finding obstacles in 3D using a LiDAR is well known. Two approaches exist:
Naive approaches, using unsupervised 3D Machine Learning
Deep Learning approaches, using algorithms such as RANDLA-NET.
👉 I teach both approaches in my courses on LiDAR.
2. 3D Obstacle Detection (Camera)
This process is much harder, especially when using a monocular camera. Finding obstacles in 3D requires us to know exactly our projection values (intrinsic and extrinsic calibration) and to use Deep Learning. Knowing the size and orientation of the vehicle will also be crucial if we want to get a correct bounding box.
As this is an article on Fusion, I'm not going to cover the detection part. Here's a popular paper that does it.
Finally, let's worry about matching.
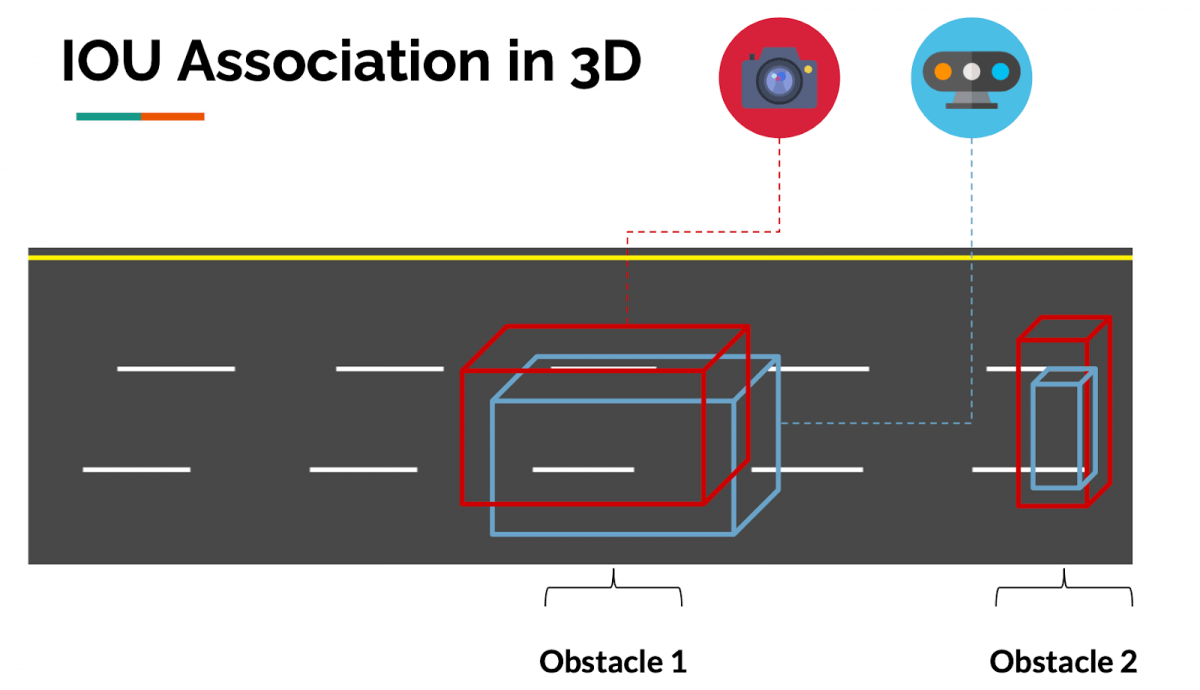
3. IOU Matching
IOU Matching in Space
The process behind matching is dead simple: If the bounding boxes from CAMERA and LiDAR overlap, in 2D or 3D, we consider that obstacle to be the same.
Here's an example coming from the paper 3D Iou-Net (2020) .
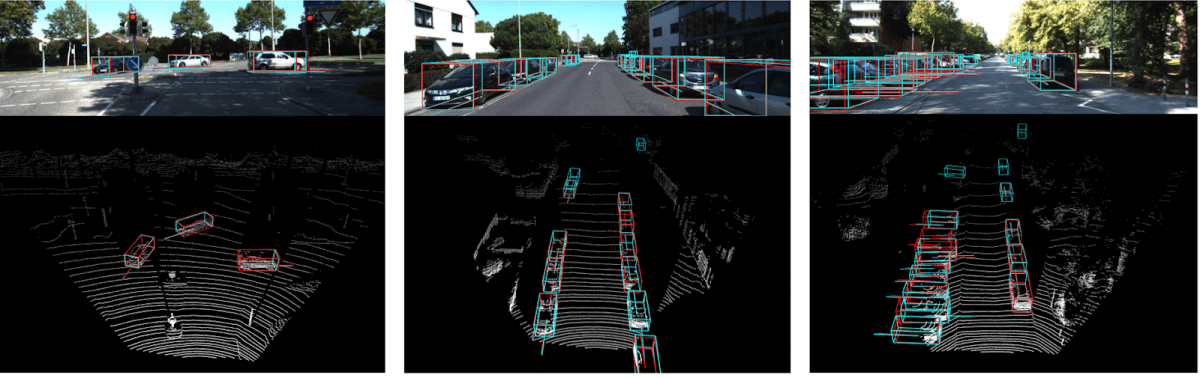
Using this idea, we can associate objects in space, and thus do an association between the different sensors.
This process has been categorized in this article as a mid-level sensor fusion.
The difference between mid-level sensor fusion and high-level sensor fusion is that high level sensor fusion includes tracking.
To add time tracking, we'll need a similar process called Time Association.
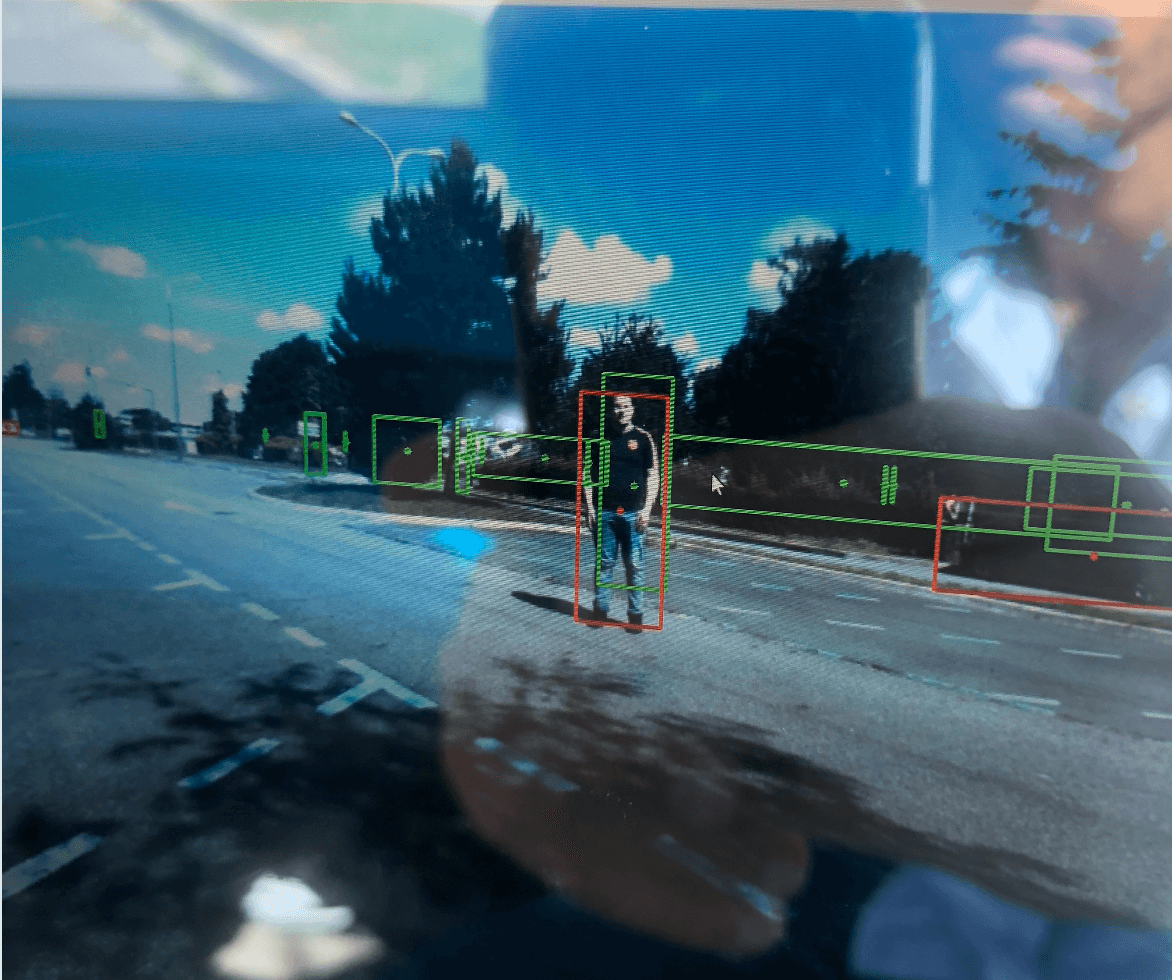
IOU Matching in Time
In my course LEARN OBSTACLE TRACKING , I teach a technique using a Kalman Filter and the Hungarian Algorithm to associate objects in time, from frame to frames. The result allows us to track objects between frames, and to even predict their next positions.
Here’s what it looks like.
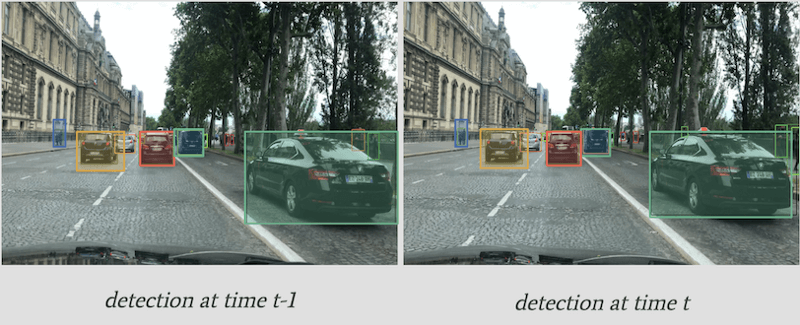
The principle of IOU Matching is exactly the same: If the bounding boxes from frame 1 to frame 2 overlap, we consider this obstacle to be the same.
Here, we’re tracking the bounding box position and use IOU (Intersection Over Union) as a metric. We can also use deep convolutional features to make sure the object in the bounding box is the same — we call this process SORT (Simple Online Realtime Tracking), or Deep SORT if we use convolutional features.
Since we can track objects in space, and in time, we can also do high-level sensor fusion in this approach, using the exact same algorithms.
Conclusion
We have now looked at two approaches for LiDAR and Camera fusion.
Let’s summarize what we’ve learned:
The sensor fusion process is about fusing the data from different sensors, here a LiDAR and a camera.
There can be early or late fusion — early fusion (low-level sensor fusion) is about fusing the raw data. Late fusion is about fusing the objects (mid-level sensor fusion) or the tracks (high-level sensor fusion)
When doing Early Sensor Fusion, we want to do the association between point clouds and pixels or boxes.
When doing Late Sensor Fusion, we want to do the association between results (bounding boxes) and thus have algorithms such as the Hungarian Algorithm and Kalman Filters to solve it.
I hope this helps!
Here are two other articles you can read on Sensor Fusion:
If you're interested in autonomous vehicles, sensors, and cutting-edge technologies, I'm publishing to a mailing list everyday! If you subscribe, you'll get more technical content, but also stories, career tips, and insider knowledge to become a self-driving car engineer, and work in the cutting-edge.